I had put off sewing this project for so long, because my Socialite Sister™ wanted to change my Godchild’s bed from a Queen size to a Twin Size. That never ended up happening and in the meantime, I got distracted. But it was now time to get cracking on this Queen Ruffled Bed Skirt.
Using this tutorial, I spent hours tackling this project. Lots of yardage. OMG. I have a new respect for my Mom who always sewed Home Decor—everything from King Size circular bed skirts to ornate pillow shams.
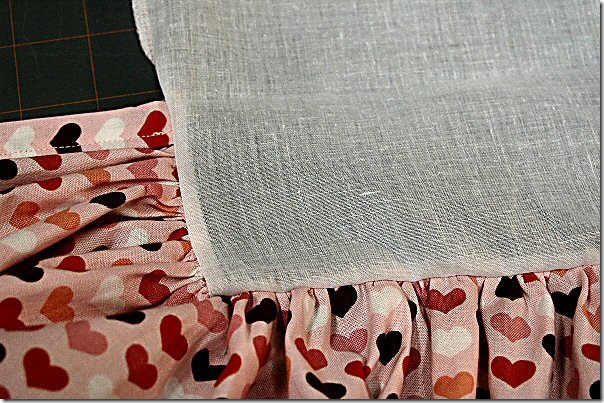
If you’re going to make one, I strongly suggest you buy a cheap bed skirt and use the decking (base fabric that sits on the box spring) instead of buying wide width material. For $13, it was more cost-effective than ordering oversized material online.
Rip off the cheap polyester bed skirt from the decking and serge the decking edges (or sew a zig zag stitch to keep it from fraying).
This one-way print was a nightmare. I suggest you find an all-over pattern to cover up any mistakes you make. I had to sew 14 panels together to get the required length for the ruffle panels. And then I realized the fabric was off grain…UGH! So I did what every good seamstress would do…I fudged it. Hopefully, it won’t be noticeable.
The bed skirt requires 3 lengths of fabric: 2 long side panels and the bottom panel. To help me keep track of which panel was which, I used quilter’s clips—one clip on panel one, 2 clips on panel 2 and 3 clips of panel 3.
Since I don’t have a gathering foot for my sewing machine and I can’t estimate the amount of ruffling needed using my ruffler foot, I opted for my 5 Groove Pintuck foot and did things the old fashioned way. It’s times like this when a Cording foot would come in handy.
Anyway, the pintuck foot has a groove on both the top and bottom.
I used buttonhole thread (you could use any thick thread), placing the spool on the extra thread stand.
I then passed it through the groove in the front of the foot and pulled it through the back, leaving a long thread tail.
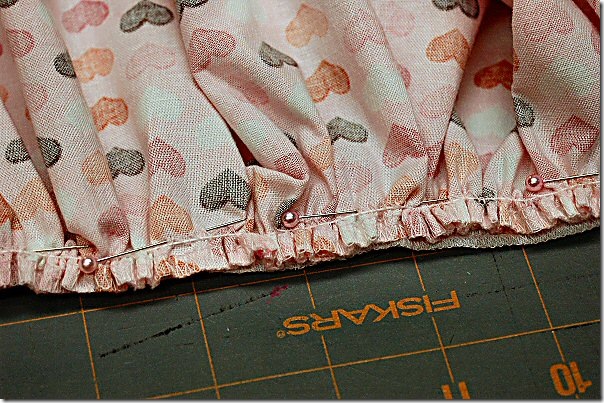
I lined up the top edge of my fabric panel and stitched a wide zig zag over the buttonhole thread. Make sure you don’t catch the buttonhole thread in your zig zag stitch.
I then divided both my fabric panel and decking into quarters (mark with a water-soluble marking pen). Match up the quarter marks and pin at each quarter. Now pull the buttonhole thread at each quarter to gather up the fabric panel to the size of the decking.
Space out your gathers evenly and pin to the decking (right sides together).
I then used my Edge Stitching foot to sew the gathered fabric panel to the decking.
Then I ran it through my serger to give it a professional look.
Oh…and one thing I should mention: Extend your fabric panels around the side if you have corner bed posts.
Overlap the fabric panels. This allows the dust ruffle to hang nicely.
Done! Another UFO crossed off my list! Next up…two matching pillow shams. But that will have to wait until next week. I have a big BBQ this coming weekend!
Happy Sewing!
With friendship,
Lisa


YAY! You did it Lisa! Very nice and so wonderful to check something off the list. Have fun at your rockin’ BBQ!
Thanks Sivje! I thought I was NEVER going to finish it…LOL!
Awesome, Lisa! I hope your Godchild loves it and uses it for many, many years.
Wow!!!! That was some serious yardage! Great job, Lisa!
Thanks Ladies! So glad it’s finally done! LOL
Diva, go out and purchase the ruffling foot for that Viking – it is the BOMB-DIGGITY! Really it is probably my MOST favorite foot! 🙂 Spendy
Spendy…of course, I already have a ruffling foot. Just can’t figure out how to gauge it perfectly…LOL! Thanks!
I’m not a fan of the bed skirt base parts b/c they are so flimsy they always rip on me. What I like to do instead is get an inexpensive fitted sheet and sew the ruffled skirt along the top edge. Then just put the sheet on the box springs. 🙂 Bought the spendy ruffle foot for my Viking, but do all my ruffling on my Babylock serger instead.
Shanna…a regular fitted sheet is a great idea! Going to try that next time. I use both my Viking ruffler foot and Viking serger ruffle foot. Just depends what I’m in the mood for…LOL!
With friendship,
Lisa