Outside Looking In…

Came across this web site, CRAVE, which reviews different products (mostly electronics).  Anyway, they were reviewing one of the new high-priced Bernina sewing machine.

Crave wrote:

All of this is well and good, but don’t think you’ll be saving money by making your own clothes with this machine. It goes for $8,200. Wouldn’t it be easier (and cheaper) just to buy a new wardrobe?

Guess that’s how the non-sewing world sees things.  They do have a point though…LOL

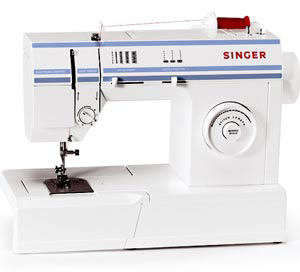
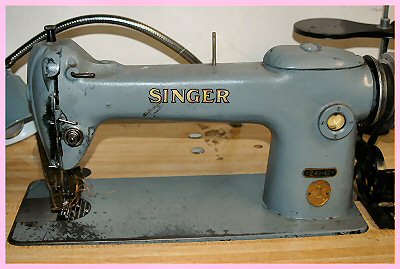
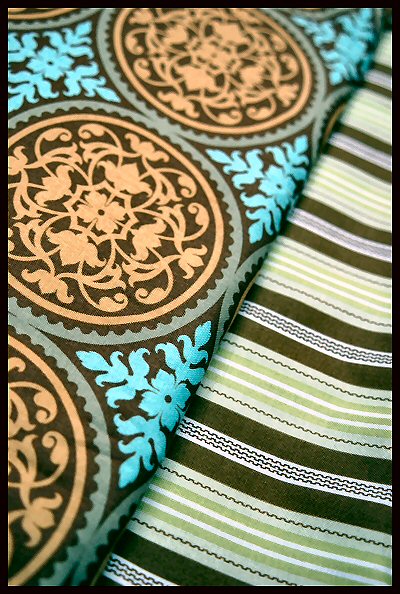
I remember when I purchased my first sewing Singer machine for $169 at Caldor’s 6 years ago.  I was just learning how to sew and the possibilities were endless–I thought I could sew anything.  Well, I broke and returned 2 of them within 3 months (most likely due to operator error).

singerfirst.jpg

Soon the overwhelming need to monogram anything and everything hit (thanks Martha) and I purchased one of those White $399 embroidery-only machine from the Viking dealer inside my local Joann’s craft store.  The limited embroidery card selection (not to mention the $60 price per card) and small hoop size soon got in the way of my big sewing plans.

whiteembroidery.jpg

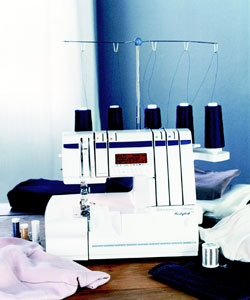
In the meantime while having my crappy Singer repaired, my local sewing repairman talked me into purchasing a 3/4 thread Pfaff serger for $500.

pfaffserger.jpg 

 While it was a great serger, I was hearing all this talk on the internet about the coveted coverstitch feature…something my Pfaff serger was lacking.  So off to Viking I went…returning home with their top-of-the-line 936 serger.  I was in Heaven!  Mr. Diva’s wallet was now $1,800 lighter.

936b.gif

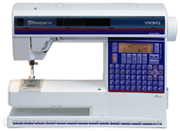
While attending a serger class, the Viking instructor talked me into trading in the cheapo White embroidery machine for a Husqvarna Viking Rose 605 sewing/embroidery machine at the cost of another $2,700. 

rose.gif

However, the instructor “forgot” to mention I’d need embroidery software and a reader/writer box.

3dembroiderystudio.jpg 3ddigitizing.jpg

hvquickfonts61.jpg

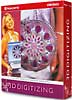
Well, more than a $1,000 later, I thought I was set.  Little did I know, I’d have to purchase software upgrades at the tune of another $800!  But fine, my embroidery abilities were now endless.  I started getting large embroidery orders and now required yet another embroidery machine.

Custom Order 

Custom Diaper Covers

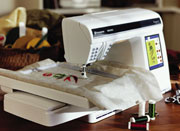
I then became the proud owner of “Iris.”  I told my husband that I had purchased it for my daughter…ummm, I lied.  Now I could have two embroidery machines running at the same time!

iris.jpg

I was enjoying my 936 serger, but it became apparent that I was too lazy to keep switching over from the 4 thread to the coverstitch function.  Thus, I added a used Viking 905 to my “collection.”

husk905.jpg

My bright idea was I’d use the 905 for 4 thread serging and the 936 for coverstitching.  But once your drive a 936, you just can’t settle for less.  The 905 didn’t have the cool LCD sewing advisor making it a deal breaker.  So I spent the next year searching eBay for a used 936.  I also called my Viking dealer to see if they had any 936 floor models available.  No such luck…but she did mention she had a great sale on the Designer I sewing/embroidery machine (their top-of-the-line at the time) for a mere $4,500…SOLD!  Anyway, Mr. Diva was planning a solo trip to Las Vegas and I’d be stuck home with the kids–the Designer I would be my reward…LOL! 

 viking_d1.jpg

Six months later, Mr. Diva decided to make another trip out to Las Vegas and that meant another “reward” for me.  I told him I’d like a used 936 serger which I spotted on eBay for $900.  He asked why I didn’t want a new one from the dealer and I told him it would cost $1,700…but he said it would be smarter to buy it new thus getting the dealer warranty.  He had a point…haha.  Well, luckily Viking was having their Black Friday holiday sale and I was able to pick up a new 936 for only $1,300.  Score! 

Now I was set–3 Viking sewing/embroidery machines and 3 Viking sergers.

sewingcleanup51.jpg

Or so I thought…

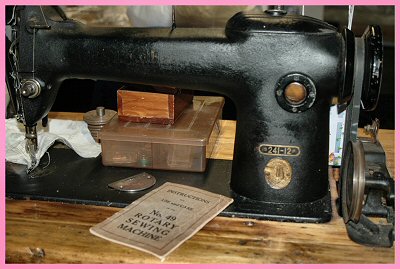
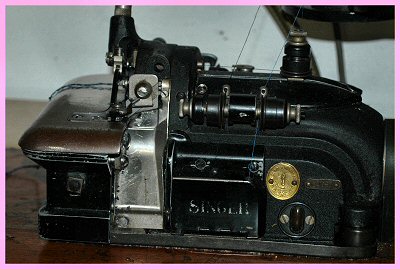
If you hang around long enough on the sewing forums, you’ll hear all about how Industrial sewing machines put even the top-of-the-line home sewing machines to shame.  I tried to ignore the impulse for as long as possible, but once again got sucked in.  However, I could not justify spending over $1,000 for a new Industrial machine, so I began searching eBay once again for used machines.

As luck would have it, a local seamstress was downgrading and I became the proud owner of 4 (yes, FOUR!!!) Industrial machines!  Now the best part was I won her “upholstery business” for a mere $154!!!  She even threw in an extra motor, industrial grommet press and tons of machine attachments.

singer1.jpg

singer2.jpg

singeroverlock.jpg

Did I mention I’m now in the market for a used Industrial Coverstitch machine?

 It just never ends…

lisasiggie.jpg

SEWING ROOM ORGANIZATION CHALLENGE – PART IV LACES, TRIMS AND RIBBONS©

LACE, TRIM AND RIBBON ORGANIZATION

WARNING

IF YOUR STASH FITS IN EITHER OF THESE,
READ NO FURTHER…
We will only CORRUPT YOU!


For some of us, our lace, trim and ribbon collection is a jumbled pile of knots. As a collector hoarder of polka dot ribbon, vintage lace and tatting, I needed to find a system where I could easily see what I had on hand when inspiration strikes.

SORT

Let’s start by taking a little inventory of our “collections.” Make 3 boxes:

KEEP – Only keep those which you LOVE or will use within the next 2 years.

DONATE – Although you may LIKE these, you’ll never use them. Give them to a friend or charitable group who will. Let’s face it, you are never going to use that 99 cent red foil Christmas trim you purchased from the Joann’s clearance bin 7 years ago!

TRASH – Stained or damaged items which nobody wants. Throw out that water-stained satin ribbon!

Next, you may need to clean your lace and trims if you haven’t already done so. We know to preshrink our fabrics, but many of us forget to do this to our lace and trims (don’t be washing that vintage silk velvet ribbon…bad idea…LOL). This is something I find necessary to do as I am always purchasing vintage trimmings. I love OxyClean to remove stains and rejuvenate vintage items. It may not be the best or safest method, but it works for me.

HOLD

Once laces and trims are washed, give them a quick press (if necessary and/or you are a bit on the obsessive side…LOL) and put them on cards of some type. Check out some of these neat ideas for holding lace, trim and ribbon:

Ribbon Cards by Cropper Hopper come in 3 different sizes. You can put one or several different trims on each card. It has a useful saw tooth slit which holds the ribbon secure.

1 ½ x 3

http://cgi.ebay.com/ws/eBayISAPI.dll?ViewItem&item=150149509569&ssPageName=MERCOSI_VI_ROSI_PR4_PCN_BIX_Stores&refitem=150149388519&itemcount=4&refwidgetloc=closed_view_item&refwidgettype=osi_widget

3 x 3

http://cgi.ebay.com/ws/eBayISAPI.dll?ViewItem&item=150154598063&ssPageName=MERCOSI_VI_ROSI_PR4_PCN_BIX_Stores&refitem=150149510066&itemcount=4&refwidgetloc=closed_view_item&refwidgettype=osi_widget

4 x 6

http://cgi.ebay.com/ws/eBayISAPI.dll?ViewItem&item=150154324819&ssPageName=MERCOSI_VI_ROSI_PR4_PCN_BIX_Stores&refitem=150135979576&itemcount=4&refwidgetloc=closed_view_item&refwidgettype=osi_widget

Love these Ribbon Holders by Sticker Stadium. These hold both wide and narrow ribbon. Starter slit keeps ribbon in place while it’s being wrapped onto the card:


http://www.stickerstadium.com/products.php

You could also use plastic PVC cards:

http://cgi.ebay.com/50-BLANK-Ink-Jet-PVC-ID-CARDS-CHEAP-Ship-cr80-30-mil_W0QQitemZ110163064224QQihZ001QQcategoryZ46695QQssPageNameZWDVWQQrdZ1QQcmdZViewItem

Try cutting up some white corrugated plastic board:

http://cgi.ebay.com/White-Corrugated-Plastic-Board-70-Sheets-15-75-x-14-5_W0QQitemZ300143883085QQihZ020QQcategoryZ45077QQssPageNameZWDVWQQrdZ1QQcmdZViewItem

I also found these neat die-cut ribbon holders in various sizes:


http://savvynsassy.com/shoppe/index.php?cPath=38

Or you could do what I do…make my own. Pretty simple…I use the cardboard from my husband’s dry cleaning shirt packs. I think they are about 8” x 11”.

I fold it in half lengthwise.

Staple the long end with several staples.

Cut into smaller rectangles.

Staple or tape trim to cardboard.

Wrap trim around cardboard and secure.

Check out these adorable one’s made by Sew-Mad. She’s included instructions on her blog:

http://sew-mad.blogspot.com/2006/08/get-organized.html

I keep my ribbon on the roll it came on…too lazy to re-roll it! Many scrapbooking gals re-wrap their ribbons onto round clothespins!

SECURE

You can secure the lace, trim or ribbon to the cards like I do using staples or tape. However, if you want to get fancy, you might want some Ribbon Clips (how many would I need? 500? 1,000? LOL):


http://cgi.ebay.com/Cropper-Hopper-Ribbon-Clips-NEW-RELEASE_W0QQitemZ130087279970QQihZ003QQcategoryZ71229QQrdZ1QQssPageNameZWD1VQQcmdZViewItem

http://cgi.ebay.com/NIP-Cropper-Hopper-Ribbon-Clips-25pk-CH92356_W0QQitemZ150154326501QQihZ005QQcategoryZ71229QQrdZ1QQssPageNameZWD1VQQcmdZViewItem

Or use tiny plastic or wooden clothes pins!

http://cgi.ebay.com/Plastic-clothes-pins-72-Pcs_W0QQitemZ130135975789QQihZ003QQcategoryZ31726QQrdZ1QQssPageNameZWD1VQQcmdZViewItem

http://cgi.ebay.com/48pcs-Mini-CLOTHESPIN-Baby-Shower-FAVOR-Baby-Blue_W0QQitemZ200146371029QQihZ010QQcategoryZ3208QQssPageNameZWDVWQQrdZ1QQcmdZViewItem

http://cgi.ebay.com/25-Natural-Wood-Mini-Clothes-Pins-Scrapbooking-Stamping_W0QQitemZ8288147602QQihZ020QQcategoryZ146545QQrdZ1QQssPageNameZWD1VQQcmdZViewItem

Check these cool Roll Buddies!

http://www.nmoa.org/PRoducts/rollbuddy.htm

However, there is always the cheapskate way…straight pins!  LOL

STORE

Now it’s time to figure out what storage system will work best for you. I use three tall Rubbermaid™ rolling carts with clear drawers for my lace, trim and ribbon stash. Each drawer is labeled making retrieval simple. I even use clear drawer and/or cardboard dividers to keep the rows of laces and trims neat.

You can organize them by Type, Color, Thickness, Texture and/or Patterns (example: all polka dot ribbon in one category, stripes in another, all pink trim together, etc.). Here’s how I’ve sorted mine:

Lace Collection
Tatting
Vintage Lace
Heirloom Lace
Alencon Lace
Lace Scraps

Trim Collection
Light
Medium
Dark
Miscellaneous

Ribbon Collection
Grosgrain – thin
Grosgrain – medium
Grosgrain – wide
Satin/Organza – thin
Satin/Organza – medium
Satin/Organza – wide
Other


Every time I open my Tatting drawer, I drool!


Vintage Laces


One of my ribbon drawers

There are so many different ways to store your stash. Find one that is right for you. Here are some ideas:

JARS

If you have a small collection, you can store your stuff in clear Ball™ Jars. Target also has some cheap glass ones. Either wrap the lace, trim or ribbon around old-fashioned clothing pins or just stack rolled ribbon in the jar itself.

BOXES

Cropper Hopper has these great ribbon boxes in 3 different sizes:


http://img.inkfrog.com/pix/domesticdiva/ribboncaddy23_001.jpg” />
<a href=”http://cgi.ebay.com/NIP-Cropper-Hopper-2-25-Ribbon-Spool-Drawer-CH92411_W0QQitemZ150154327158QQihZ005QQcategoryZ71229QQssPageNameZWDVWQQrdZ1QQcmdZViewItem

I bought these my local Discount Store. I use them to store thin satin craft ribbon. Each box fits more than a dozen of the thin ribbon rolls:

http://cgi.ebay.com/RIBBON-ORGANIZER-DURABLE-WOOD-CONSTRUCTION-HOLDS-6-ROLL_W0QQitemZ220070087135QQihZ012QQcategoryZ71224QQrdZ1QQssPageNameZWD1VQQcmdZViewItem

These are great as the lids stop the ribbon from unraveling:

http://cgi.ebay.com/STORE-IN-STYLE-SCRAPBOOK-CRAFT-RIBBON-ORGANIZER-NEW_W0QQitemZ260145835974QQihZ016QQcategoryZ71229QQrdZ1QQssPageNameZWD1VQQcmdZViewItem

Make your own Ribbon Boxes courtesy of Martha – Begin with a cardboard container (CD storage or photo box). With a utility knife, make a 1/4-inch hole in the center of both short sides. Place ribbon spools in box. Cut a 1/4-inch-thick dowel to length of box, and slide through box and spools; press wide thumbtacks into dowel ends. Cut slits for ribbon, and pull ribbon ends through. For a polished look, attach grommets using a grommet kit (available at hardware stores), and label side of box.

And if you want yours to look as good as Martha’s, just buy hers…LOL:


http://www.marthastewartcrafts.com/detail.php?p=19743&SESSID=92f417be214876bbe8fe33ff97110e24

Or you can make this one from About.com:

http://scrapbooking.about.com/od/gettingorganized/ss/ribbonbox.htm

Instead of making separate holes for each ribbon to slide through like above, consider just making one long slit in the front of the box. You can also cut holes on each short side to insert a dowel. Make sure you leave enough room for the rolls to spin.

Dollar Store Basket – Purchase a rectangle basket that has holes on all four sides. Place ribbons inside and thread ribbon through the holes. It doesn’t get much easier than this!

Here’s a portable one for those who can’t keep their ribbon displayed:

http://cgi.ebay.com/Craft-Ribbon-Organizer-Scrapbooking-Cardmaking-Crafts_W0QQitemZ104753797036QQihZ020QQcategoryZ71229QQrdZ1QQssPageNameZWD1VQQcmdZViewItem

DRAWERS

OMG!!!! How BEAUTIFUL are these Ribbon Lockers? Apparently, they are so popular that they are currently back-ordered!


http://www.craftlocker.com/index.php?main_page=product_info&cPath=1&products_id=1

Check out this gorgeous handmade ribbon drawer:

http://cgi.ebay.com/Ribbon-Storage-Drawer-Melissa-Frances-White-JA649_W0QQitemZ150153402503QQihZ005QQcategoryZ71229QQssPageNameZWDVWQQrdZ1QQcmdZViewItem

Perhaps try some of the Sterlite™ rolling drawer units:


http://www.target.com/gp/detail.html/sr=1-4/qid=1188311173/ref=sr_1_4/601-1872350-6472920?ie=UTF8&asin=B000MPQ2S2

http://www.target.com/gp/detail.html/sr=1-8/qid=1188311299/ref=sr_1_8/601-1872350-6472920?ie=UTF8&asin=B000AVS3FS


RACKS

These professional display racks will work wonderfully if you have an unlimited budget:

http://www.floralsupply.com/cat.cgi?s=CRM-5%20Vertical%20Ribbon%20Rack&c=disp

http://www.floralsupply.com/cat.cgi?s=CRM-5%20Vertical%20Ribbon%20Rack&c=disp

However, instead of shelling out all that cash, why not use an adjustable CD rack?


http://cgi.ebay.com/Elf-Jr-Multimedia-Storage-Tower-CD-DVD-Rack-Shelf-Gift_W0QQitemZ260153504503QQihZ016QQcategoryZ22653QQssPageNameZWDVWQQrdZ1QQcmdZViewItem

HANGING HOLDERS

Use a 5 pair metal slacks hanger. Slide the ribbon rolls onto the bar and reattach the latch.

http://cgi.ebay.com/SWING-ARM-SLACK-PANTS-HANGER-CLOSET-ORGANIZER_W0QQitemZ300145314710QQihZ020QQcategoryZ43505QQssPageNameZWDVWQQrdZ1QQcmdZViewItem

Over the Door Rack (usually used for canned goods or video tapes) are perfect for storing ribbons on rolls:


http://www.target.com/gp/detail.html/sr=1-1/qid=1188310719/ref=sr_1_1/601-1872350-6472920?ie=UTF8&asin=B00077JFWA

This Shoe Rack might also work:

http://cgi.ebay.com/ws/eBayISAPI.dll?ViewItem&item=330160148926&ssPageName=MERCOSI_VI_ROSI_PR4_PCN_BIX_Stores&refitem=330155054021&itemcount=4&refwidgetloc=closed_view_item&refwidgettype=osi_widget

MOUNTED HOLDERS

While my mind is in the Gutter, darling Martha is thinking vertical! Use Gutters to keep ribbons and trims organized. Have a lumberyard (or your local home improvement store) cut a half-round copper or plastic gutter to size and add gutter end caps.

Cropper Hopper’s Rail System Holder:

http://cgi.ebay.com/Lisa-Becky-Organizer-Ribbon-Spool-Holder-Cropper-Hopper_W0QQitemZ140146807581QQihZ004QQcategoryZ146402QQrdZ1QQssPageNameZWD1VQQcmdZViewItem

http://www.target.com/gp/detail.html/sr=1-1/qid=1188311429/ref=sr_1_1/601-1872350-6472920?ie=UTF8&asin=B000REOFUK

Regular or Magnetic Café Curtain Rods make a great ribbon holder:

What about a Bathroom Towel holder?

A paper towel holder would work, too!

The Ribbon Buddy™ is by far MY VERY FAVORITE (I have two of these)!  It can either be mounted to the wall or hung over a door. Best of all, it’s can be brought over to your work surface as it has an A-frame! I use it for all my rolls of tulle and trim (the cheap stuff). During the holidays, I add rolls of wrapping paper, too. I’ve looked everywhere to find these online to no avail…sorry!

Love this one from Organize More as it has no dowels:

http://www.organizemore.com/product.sc?productId=11

Check out this terrific Ribbon Wheel:


http://cgi.ebay.com/New-Ribbon-Rack-Organizer-Crafts-Scrapbooking-Sewing_W0QQitemZ160124243748QQihZ006QQcategoryZ71229QQrdZ1QQssPageNameZWD1VQQcmdZViewItem

You can also purchase a Quick Release Mounting Bar for the above Ribbon Wheel:

http://cgi.ebay.com/New-Quick-Release-Mounting-Kit-to-Ribbon-Rack-Organizer_W0QQitemZ160063376829QQihZ006QQcategoryZ71229QQssPageNameZWDVWQQrdZ1QQcmdZViewItem

The ribbon wheel can also be clamped to a table with these:


http://cgi.ebay.com/New-Table-Clamp-Kit-for-Ribbon-Rack-Organizer_W0QQitemZ160063369113QQihZ006QQcategoryZ71229QQssPageNameZWDVWQQrdZ1QQcmdZViewItem

Darla Jones’ husband, Ralph, created this awesome Ribbon Wheel which holds 170 – 200 rolls!!! It can be mounted to the wall or a table. WOW! Ummm…Darla, can I borrow your husband? I promise to return him when I’m done…LOL

I adore this Ribbon/Trim Holder Carrin of Rain’s End made for her stash. She even painted it, too! Detailed instructions can be found on her blog:

http://rainsend.blogspot.com/2007/08/ribbon-drawer-organizer-project.html

RINGS

A Ring and Header system works great for scrapbooking:

ribbonring

Ribbon Rings and Ribbon Tags 

And when you’re ready to use your newly organized stash, perhaps you might want one of these nifty gadgets:


Pebbles™ Ribbon Iron

http://cgi.ebay.com/RIBBON-IRON-scrapbooking-PEBBLES-INC-mini-iron-CRAFTS_W0QQitemZ110162558827QQihZ001QQcategoryZ134628QQssPageNameZWDVWQQrdZ1QQcmdZViewItem

http://cgi.ebay.com/Pebbles-Inc-Ribbon-Iron-NIP_W0QQitemZ330115485832QQihZ014QQcategoryZ11791QQrdZ1QQssPageNameZWD1VQQcmdZViewItem

You could also use a hair straightening iron set on LOW and better yet, a regular iron! The Ribbon Iron would come in handy if you needed portability.

If you have any clever ideas for organizing your lace, trims and ribbons, I’d love to hear about them!

Happy Organizing!

Nothing like Free Listing on Ebay to get you moving…

tar1.jpg

Spend the entire morning creating my auctions for today….6 in total…woo hoo…

aba4.jpg

My little man wasn’t too cooperative last night, so my pics are not the greatest.  Guess next week I’ll be quite busy in the sewing room as all 6 boys’ sets end within hours of each other…luckily 2 of them are Ready to Ship!  Check out my ebay auctions.

Tonight I’m going to take out the new Joel Dewberry  and my new bolt of this great Kaufman boys’ tool fabric…press it, lay it out and cut some new boys’ shirts!  I can’t wait to match this tool fabric up with some yummy lime, orange, brown and/or turquoise denim!  That should keep me out of trouble…LOL!

kaufmantools.jpg

lisasiggie.jpg

The Diva’s 3rd Annual NYC BBQ was a HIT!

bbqnapkin1.jpg

I can’t believe I haven’t shared about the big BBQ last week…Saturday, August 4th here in NYC.  It was HOT…like 94 degrees!  Yet we had a crowd of about 140 people…friends and family came from all over the country.

 We were having soooo much fun and didn’t take many pictures.

The menu consisted of Filet Mignon skewers in both BBQ sauce and Teriyaki, jumbo shrimp cocktail, Italian Sweet and Hot Sausages, Sweet Roasted Peppers, tons of Sirloin Cheeseburgers and Hot Dogs.

The desserts were a hit…tons of cakes from our favorite Italian Bakery in Brooklyn, Villabate Pasticceria & Bakery http://www.villabate.net/pages/6/index.htm , which included Champagne Cake, Cheesecake w/ fresh strawberries,  Strawberry Shortcake and several other of their yummy creations.

 600_storefrontcakedisplay2-s.jpg600_cookiedisplaycase2-sjpg.jpg600_cakesdisplay2-s.jpg

Lady M™ aka Myrinda sweetgirlboutique send me Shari’s Berries and Jessica littlelamslane brought a huge tray of her infamous Boutique Toffee™ (and a little private stash for me).  I also made a giant candy cart with enough sugar to send the kids into a coma…LOL!  Also had two hours of cotton candy from the big old fashion cotton candy machine!  Almost forgot to mention, everyone loved the delicious homemade Italian Ices from LaRocca’s…they are always a hit!

 We had a great magician and card shark, the giant Moon Bounce and the Pirate Ship ride  (yes, I went on both…thankfully there are no pictures of me acting like a fool!).  There were several babysitters for the little ones so the parents could eat, drink and be merry!

Picture credits go to Becca of Bren and Co., Karen of My Girl Kristi, Karen and Sue Wizard…

img_4291.jpgjacqwhitneyweb1.jpgkristiatpartyweb.jpglighthouse1web.jpgnyc7.jpgnyc8.jpgrockefellercenter2web1.jpgtoysrusweb1.jpgwtcsiteweb1.jpgdb.jpgimg_1041.jpgimg_1045.jpgimg_1046.jpgimg_1049.jpgimg_1050.jpgimg_1052.jpgimg_1055.jpgimg_1063a.jpgimg_4290.jpgdb3.jpgdb4.jpgdb5.jpgdb6.jpgdb10.jpgdb11.jpgdb12.jpgdb13.jpgdb14.jpgdb17.jpgamandakristweb1.jpgbbq2web.jpgbbq3web.jpgdb1.jpgdb2.jpg

Been Hanging out in the Sewing Room…

Did you miss me?  LOL

I’ve been busy embroidering a dozen canvas tote bags for my friend, Kacey, to give to her new students.  I created the embroidery files with my Viking 3D software and stitched them out using some Amy Butler, Michael Miller and Jane Sussman fabrics.  Hope she and the kids like them…

kaceybags.jpg

It was a GREAT mail day… my Joel Dewberry fabrics arrived from one of the Yahoo fabric coops I belong to…YUMMY!  Can’t wait to cut into these for some cool boy’s button-down shirts!

joeldewberry.jpg

I finally added the darn snap on the side pocket and a tab for the keychain on my boys’ Abacus set…it only took me like 2 months…haha~but it’s done.  Tonight I’ll bribe my 5-year-old son with a dollar and some rocks so I can get some pics of him in it for my ebay auction…

Abacus

Check out this cool keychain I found…an Electronic Organizer with a stylus (bought a dozen in lime, turquoise and orange)…it even has an alarm…ROTFL!

abaprev5.jpg

Here’s the side pocket detail…now that pocket was a PAIN…but I’m pretty happy with the way it turned out.  However, I’m thinking this set just might be a one-of-a-kind as I’d dread having to do that pocket again!

abaprev2.jpg

 Tomorrow I need to finish several other boys’ sets which need to get listed on ebay…

 Hope everyone is having a great day!

lisasiggie.jpg