Sewing a Ruffled Bed Skirt aka Dust Ruffle

dust12

I had put off sewing this project for so long, because my Socialite Sister™ wanted to change my Godchild’s bed from a Queen size to a Twin Size.  That never ended up happening and in the meantime, I got distracted.  But it was now time to get cracking on this Queen Ruffled Bed Skirt.

Using this tutorial, I spent hours tackling this project.  Lots of yardage.  OMG.  I have a new respect for my Mom who always sewed Home Decor—everything from King Size circular bed skirts to ornate pillow shams.

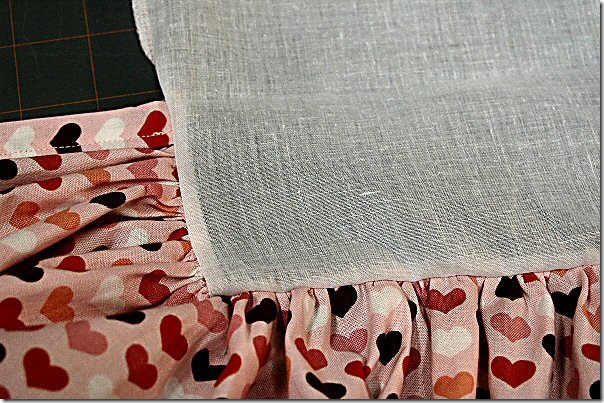
If you’re going to make one, I strongly suggest you buy a cheap bed skirt and use the decking (base fabric that sits on the box spring) instead of buying wide width material.  For $13, it was more cost-effective than ordering oversized material online.

Rip off the cheap polyester bed skirt from the decking and serge the decking edges (or sew a zig zag stitch to keep it from fraying).

dust2

This one-way print was a nightmare.  I suggest you find an all-over pattern to cover up any mistakes you make.  I had to sew 14 panels together to get the required length for the ruffle panels.  And then I realized the fabric was off grain…UGH!  So I did what every good seamstress would do…I fudged it.  Hopefully, it won’t be noticeable.

The bed skirt requires 3 lengths of fabric:  2 long side panels and the bottom panel.  To help me keep track of which panel was which, I used quilter’s clips—one clip on panel one, 2 clips on panel 2 and 3 clips of panel 3.

dust5

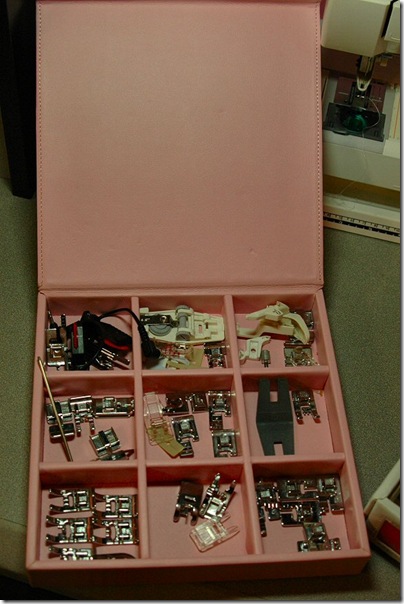
Since I don’t have a gathering foot for my sewing machine and I can’t estimate the amount of ruffling needed using my ruffler foot, I opted for my 5 Groove Pintuck foot and did things the old fashioned way.  It’s times like this when a Cording foot would come in handy.

dust6

Anyway, the pintuck foot has a groove on both the top and bottom.

dust7

I used buttonhole thread (you could use any thick thread), placing the spool on the extra thread stand.

dust8

I then passed it through the groove in the front of the foot and pulled it through the back, leaving a long thread tail.

dust9

I lined up the top edge of my fabric panel and stitched a wide zig zag over the buttonhole thread.  Make sure you don’t catch the buttonhole thread in your zig zag stitch.

dust10

I then divided both my fabric panel and decking into quarters (mark with a water-soluble marking pen).  Match up the quarter marks and pin at each quarter.  Now pull the buttonhole thread at each quarter to gather up the fabric panel to the size of the decking.

dust11

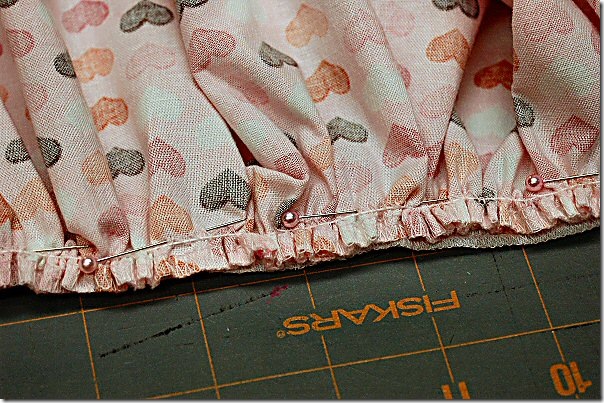
Space out your gathers evenly and pin to the decking (right sides together).

dust1

I then used my Edge Stitching foot to sew the gathered fabric panel to the decking.

dust3

Then I ran it through my serger to give it a professional look.

dust4

Oh…and one thing I should mention:  Extend your fabric panels around the side if you have corner bed posts.

 dust13

Overlap the fabric panels.  This allows the dust ruffle to hang nicely.

Done!  Another UFO crossed off my list!  Next up…two matching pillow shams.  But that will have to wait until next week.  I have a big BBQ this coming weekend!

divaqburger

Happy Sewing!

With friendship,

Lisa

Sew Tuned In

divatv22

I must have been living under a rock.  Two new sewing shows?  Oh yeah!

seweasy

First up is It’s Sew Easy!  The scheduled initial air date was Thursday, June 30, 2011.  It replaces America Sews with Sue Hausmann.  Here’s some info I found on their website:  

It’s Sew Easy offers a new concept to Public Television viewers. The program does not feature a main host, but is based on designers and education that revolves around the experts. The focus is on contemporary style, not age. The goal is not to stress perfection, but rather concentrate on easy ways to accomplish a great project. Projects will be easy enough for beginners but creatively challenging, combined with interesting style elements to pique the interest of all sewing enthusiasts.

shereeitssoeasy 

Special guest designers appearing include: Valerie Mayen and Suede (both of Project Runway fame), Bobbie Bullard, Colbey Decker, Shannon Dennis, Stephanie Kimura, Nancy Odom, Eileen Roche, Peggy Sagers, my beautiful Sheree Schattenmann, Angela Wolf, Linda Augsburg, Pamela Damour, Tricia Waddell, Londa Rohlfing, Janet Pray, Cindy Losekamp, Gina Moorehead, Rebecca Cornell, Christy Howden, and Trish Preston.

The format will include two main projects per week and one shorter technique segment. Shows will be themed. Each project will include project instructions and a pattern with a link to the instructions found on the It’s Sew Easy website, plus additional related projects and patterns.

Show themes include: Apparel Details and Embellishments, Simple Sewing-Easy Tricks, Dress Up Ready Made Home Décor, Garment Construction Tips, Surface Embellishment, Restyling, Fun Fabrics, T-shirt Surgery, Gifts, and more.

It’s Sew Easy taped in March, 2011. It will be available to all Public Television stations across the country. The shows are shot and posted at EDR Media’s Beachwood Studios Production Center in Beachwood, Ohio.

Unfortunately, I haven’t been able to find it on my TV lineup.  I do, however, get Sue Hausmann’s show, so maybe I’ll get it soon.  Fingers crossed.

1018_image

Next up is Sew It All TV!  Use the TV station finder to see if it’s available in your broadcasting area.  If not, write your local TV station and request it!  And no, I also don’t have this show in my broadcast area.  FML.

tahiti1

Ok…with all this talk about sewing shows, I have to tell you…I have only TWO things on my Bucket List.  Yep.  Just two.  The first is to visit Tahiti.  I’ve been many places, but never Tahiti.  I’ve spent hours and hours surfing the web learning everything I can about Tahiti, checking airline prices, swooning over beautiful little huts in the water.  Mr. Diva said he won’t go, so in the next few years, I’ve decided I’ll just go myself.  Maybe I won’t come back.

Thirty years ago, I had plane tickets to Tahiti with this guy.  I was only 19 years old and my older brother wouldn’t let me go (fearing I would become a missing person).  He was probably right considering that guy ended up stalking me for two years until someone went and had “a talk” with him.

DIVADISASTERMOVIE

And that brings me to the second thing on my Bucket List—my own TV show.  Don’t laugh, but for years I’ve dreamed about having my own TV show.  No, not like Oprah or Martha.  More like Diva.  Yes, there would be sewing, decorating, cooking and organizing.  But it would be different, because I have no desire to make my own laundry detergent (nor of folding fitted sheets properly).

 divastarfame

My show would have to be on a cable television network, because I curse.  A lot.

DIVADIRECTOR

Oh crap.  There is already a Diva TV over in the UK!  But I’m not going to let that stop me.  I just have to figure out how to pull it off.  Any suggestions?

So tell me…What’s on YOUR BUCKET LIST?  Because I need some ideas.  Having just two things on my bucket list is sad, right?

With friendship,

Lisa

DIVABROADWAY

Sew Cuts Like A Knife

giantscissors2

Like most of you who sew, I, too, have an obsession with scissors.  Heck, I’ve had this obsession long before I saw my first sewing machine.  I’m almost positive I’ve given one of my siblings a haircut in my younger years.

Well anyway, a few months ago when I went to Eileen’s Spring Fiesta in Mechanicsburg, PA, she gave me a tour of her new sewing room.  And what do I see?

scissorsnovelty

Giant Scissors on her wall!

newscissors

Don’t you think they look AWESOME in my sewing room?  They look perfect on my Idea Board!  Thanks Eileen!

scissorfabric

So, to compensate her for my thievery of her Giant Scissors, I bough her some cool fabric out of guilt (Mrs. Sews and Sews).  I’m sure a nice friend.  Now all I have to do is actually mail it to her.  Maybe I’ll save on postage and just have her pick it up when she come to the big BBQ.  Yep…sounds like a plan.

scissors%201_full

How cool are these giant scissors by Design Dragon?  I’d be afraid to hear how much they probably cost.

giant_ribbon-cutting_scissors_collage 

Or what about these Huge Scissors?  Those things should be considered a weapon!

scissornails

Would I be nuts to get these Scissors Nail Art?  They do scream, “Seamstress.”  Actually they probably scream, “Cutter.”  I think I’ll pass.

runswithscissors

Check out this neat Runs With Scissor machine embroidery appliqué design by Claire!  Love it!

runwscissors

What about these awesome postcards?

leftmagnet

Even better for this southpaw…a magnet for my refrigerator!

Happy Sewing!

lisasiggie2

Show Me Your Sewing UFOs and PHDs

phd

Source:  PhD Decal

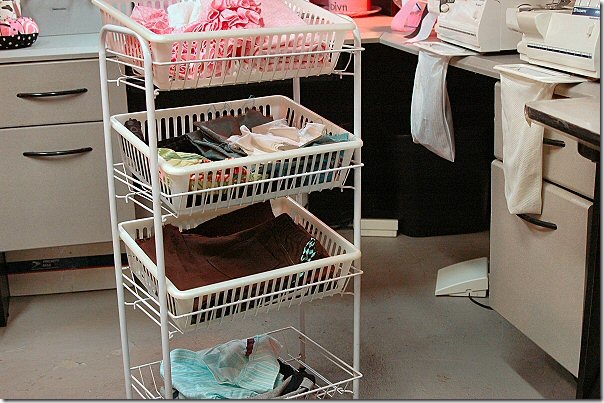
An article from Threads Magazine got me thinking about Sewing UFOs (Unfinished Objects) and PHDs (Projects Half Done).  l recently reorganized my sewing studio and came upon a bunch of sewing projects I didn’t finish for one reason or another.ufocart

I had to decide which UFOs and PhDs might actually get completed.  I had a pile of over 30 different projects.  There was absolutely no way I would ever tackle them all.  So I sorted them into 3 piles:

1.  FINISH – These projects would be my sewing projects for the next few months.  Most of these were either important or nearly completed.

2.  REUSE – Most of these projects were barely started.  The fabrics for these could be put back in my fabric stash and used for another project.

3.  DUMP – These projects were ones that went terribly wrong or no longer held any interest.  Out in the garbage they went.

Once I sorted through my pile, I evaluated each of the 13 projects that made the cut.  Here’s what I ended up with:

ufo1 

UFO #1

Project:  My Godchild’s Bedding which includes a Queen Size Quilt, 2 Pillow Shams, Dust Ruffle, Throw Pillows and Doll Bedding.  This is a massive project that I started at least 2 years ago.

Problem:  This project was first delayed, because the fabric had been discontinued and it took me more than 3 months to locate enough yardage.  But that was only part of the problem.  See, I don’t know how to quilt, nor do I really want to learn.  And then there’s the Queen Dust Ruffle:  ‎630 inches aka 52.5 feet aka 17.5 yards = panel of fabric I had to sew together to make the Queen Dust Ruffle. Did I mention it’s a one-way directional print?  That’s 14 sections. And honestly, the thought of having to gather 630 inches is a bit overwhelming to me.  Lastly, I have to find some oversized sheeting material for the Dust Ruffle deck (base) that is at least 80 inches wide.

Progress:  So far, I’ve only completed two throw pillows (a ruffled one and a print one) and some doll bedding.  This week, I managed to cut, serge and sew all 14 sections of the fabric together for the Queen Dust Ruffle.  I smartened up and solved the oversized sheeting problem by purchasing a Queen Dust Ruffle for $13 to use for the base.  I ripped off the tailored bed skirt and serged the raw edges of the base.

0417-duvet_measuring_full_queen_6

Plan:  Once I gather the 630 inches of fabric, I’ll attach it to the base for the Dust Ruffle.  For the Queen Quilt, I found a great tutorial on Sew4Home for a Queen Duvet.  I’m going to use the diagram to make the quilt top.  Then I’ll send it out to be quilted and bound (because if I don’t, it will never get done).

Probability:  High.  Serious Guilt Factor.

ufo2 

UFO #2

Project:  Four Embroidered Bath Towels and 4 Embroidered Hand Towels for my Sister-in-Law.  This project started 5 years ago when my Sister-in-Law asked me to make her some embroidered towels for her bathroom.  I finally purchased the blank towels this past Christmas.  Gave her them all gift-wrapped and then took them from her.

Problem:  My son busted my dongle (necessary key) for my embroidery software, so I had to order a new one from Husqvarna Viking (which took about 3 months to receive).

Progress:  Washed towels to shrink before embroidering.  No other progress.

Plan:  Need to design a monogram in my embroidery software, test it and then stitch it out on the towels.

Probability:  Medium.  Will become a high priority as we get closer to Christmas.

ufo3

UFO #3

Project:  Silk Curtains for the Bagel Store

Problem:  This project is stalled until my BFF decides what height she wants to hang her curtain rods.

Progress:  All that I need to do is sew the headers and bottom hems.

Plan:  I’ll sew the headers while I wait for her to hang the curtain rods.  That way all I have to do is sew the hems when she’s ready.

Probability:  High.

 ufo4

UFO #4

Project:  Baby Ruffle Pants, Baby Shirt and coordinating Burp Cloths.

Problem:  After spending time on this project, I find out the recipient is having had a BOY!  FML.

Progress:  I finished these Baby Ruffle Pants.

Plan:  To figure out what to make for the baby boy.  Something Blue.

Probability:  Pink – Low.  Blue – High.

ufo5

UFO #5

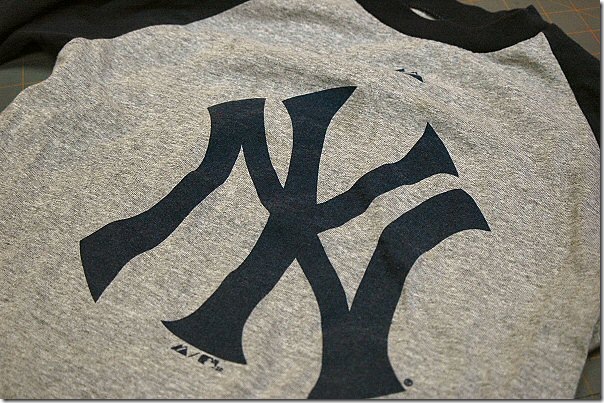
Project:  When my 9-year-old son outgrew his favorite Yankee shirt, I thought it would be perfect to make him a simple pillow out of the fabric.  That was more than a year ago.

Problem:  I could not bring myself to throw out my son’s $27 NY Yankees baseball shirt.  Only problem is I’m too lazy to just get it done.

Progress:  None.

Plan:  Cut out a square and sew it up next time I have Gray thread in my serger.

Probability:  Low.

ufo6

UFO #6

Project: In order to get my sizing perfect for this Christening Dress, I made two other silk bodices.

Problem:  I simply couldn’t throw the unused bodices out in the trash…so they need to become baby dresses.

Progress:  None.

Plan:  None at the moment.

Probability:  Very low.

ufo7

UFO #7

Project:  This turquoise silk was supposed to become a beautiful little girl’s dress.  I dyed the purchased entredeux and some vintage lace bright orange. 

Problem:  I was new to sewing entredeux, so it didn’t come out perfect like I had pictures.

Progress:  I recently purchased a beautiful soft orange netting to use as an underskirt for this dress.

Plan:  To daydream some more about this magnificent creation in my head.

Probability:  Someday I might finish this dress, but don’t count on it.

ufo8

UFO #8

Project:  I started this silk baby jacket back in September 2007…umm, that’s 4 years ago to match the silk baby bottoms.

Problem:  I got the pattern from the Baby Couture book (and no, I don’t recommend buying this book–it’s one of the worst I’ve seen for children’s garment construction).  The collar pattern was so wonky that I trashed it.

Progress:  The base of the jacket is sewn.

Plan:  Hem the sleeves and the bottom of the jacket.  Then draft a new collar pattern and finally finish this jacket. 

Probability:  Yeah right.

ufo9

UFO #9

Project:  Started these two pairs of girl’s capris probably more than 5 years ago.

Problem:  Took so long for me to get them half-done that they no longer fit my daughter.

Progress:  Solid black pair needs waistband casing, elastic and bottom hem.  Polka dot pair only needs elastic in the waist.

Plan:  Complete them for another recipient.

Probability:  Medium.

ufo10

UFO #10

Project:  Started this peasant top for my Godchild when she was a size 2T.  She’s now a size 6x/7.

Problem:  The arm elastic was too tight for her.

Progress:  All I needed to do was gather the ruffle, attach it to the bottom and topstitch it. Complete!

Plan:  To give this top to another little girl.

Probability:  DONE!

ufo11

UFO #11

Project:  Three pair of boys pants done with the exception of the inseam and bottom hem.

Problem:  Too many projects.  Easily distracted.

Progress:  Inseams done on two pair now.

Plan:  Finish 3rd pair of inseam and hem all 3 pants.

Probability:  Medium.

ufo12

UFO #12

Project:  I started this boy’s beach shirt in May 2007.

Problem:   It’s done…only need to add 5 snaps.  Talk about lazy!

Progress:  None.

Plan:  To attach the 5 snaps.

Probability:  Low.

dressd

UFO #13

Project:  Silk Christmas dress for my Godchild.

Problem:  She didn’t like it.  That and I hate doing buttonholes.

Progress:  Need to make buttonholes and attach rhinestone buttons.

Plan:  To wait to find the right recipient before attaching buttons (to ensure perfect fit).

Probability:  Medium.

Ok…so there you have…my shameful UFOs and PhDs.  So tell me, how bad is your pile?  What keeps you from finishing yours?

lisasiggie

Where I Sew – SEWING ROOM TOUR

pinkchalk_whereisew3001 

Kathy of Pink Chalk Fabrics is hosting a Where I Sew sewing room tour.  Go check out all the awesome sewing rooms around the web!

divamannequin

Thought I’d share a quick tour of my Sewing Room prior to the expansion.

sr5 fabriccollection5

sr6 

sr11 

spinner 

patternhooksinshopsr9

sewingcleanup5

sr1

sr4

sewingroomfeet1

needlestorage2

DSC_4962

waterdispenser

sr3

sr14

sr7

pinkdrawers

pressbox

sewingstickers

lacestorage

tattingstorage 

lisasiggie2 

Sewing Room Expansion

sewingroomexpansion1

WOW!  Talk about a lot of work!  I decided to expand my 13’ x 16’ sewing studio in the unfinished basement dungeon to 13’ x 35’!!!  You know, because I didn’t have enough on my To Do List.

sewingroomexpansion2

First, I moved my Wall of Fabric (3 black storage cabinets) that once sectioned off my office from my sewing studio.sewingroomexpansion4

Now the cabinets line the side of the sewing room dividing it from the laundry area.

sewingroomexpansion6

Here’s the other side of the new sewing studio.  I still have to move my massive desk, internet cables, etc.  Then I can set up all my industrial sewing machines along the 35’ wall.

 sewingroomexpansion5

Here’s the other side of the basement which will soon become my new office.  But before I can set my desk up, I have to figure out how in the world I’m going to move those huge industrial cutting tables into the sewing studio.

I also have to cover up the unfinished walls.  Luckily I still have some pink pleather fabric like I used on the existing sewing studio walls.  I even found some gray pleather fabric for the office area.

This is turning out to be more work than I had thought.  But I WILL get it done.  Come on over if you’re not doing anything.  I’ll even pay you in fabric!

lisasiggie

Vintage Lace Lust

lacelust

When asked, “What would be the one thing you would grab if your house was burning down?”…most people would automatically say, “photographs.”  Not me.  Oh no.  I’ve made it clear to my family they are to take my two drawers of vintage lace and tatting.  Seriously.  (Not to worry, all important photographs are archived off-premises.)

Since I started sewing almost 10 years ago, I’ve amassed a nice “collection” of some of the yummiest lace—needlerun, Alencon, Bucks Point, Valenciennes, Point de Paris, etc. and vintage tatting.  I only use these on special occasions—when making a Christening Dress or something over the top.

laceheadband

But yesterday, I found Marielle checking out my lace stash as I was reorganizing my sewing studio.  She begged me to make her a lace headband to wear out at night.  So, being the wonderful mother I am, I whipped up a quick headband for her.

mariellelace3

Simply measure a piece of lace to go around the head minus 5 or so inches.  Fold each end of the lace into a “V” (aka point).  Stitch to secure.  Then all you have to do is add some elastic to it.  Pretty simple, huh?

sewingremodel1

I’m in the middle of expanding my sewing studio.  I’ve been at it for almost a week now and probably have another 2 weeks or so until it’s useable.  I’ve managed to fold and put away all my fabric and trims.  That alone took 4 days! 

If I ever think about buying more flannel fabric at Joann’s Black Friday 99 cents sale, please smack me upside the head. I just realized I have more than 200 yards.

sewingremodel2

Yesterday, I moved my big filing cabinets.  Today I’ll be moving my black metal fabric storage cabinets to another area.  Thank goodness for those nifty furniture sliders.

Moving stuff around is not really the problem.  It’s trying to figure out how to supply electric and internet connections to my office area on the other side of the basement where there is none.  Wish me luck…I need it!

lisasiggie2

Fabric Hall of Shame™

fabriccollection5

Now you have all drooled over my beautiful organized fabric cabinets, right?

sewingcleanup1

And my tidy sewing room?  Well, this doesn’t tell the whole story…not even close.

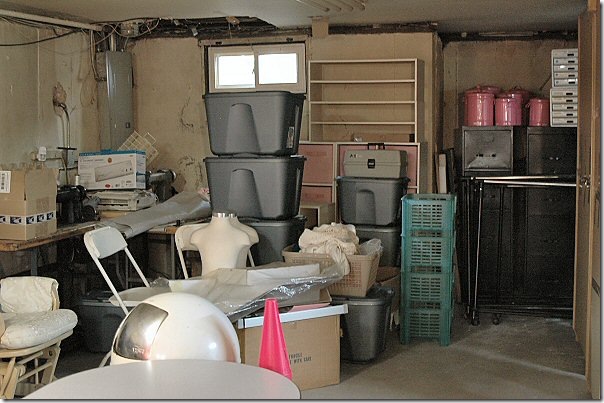
See, this part of my sewing room is a mere 1/4 of the space in my dungeon that holds all my fabric, trims, sewing machines and other notions.  The rest of the space is like my dirty little secret and it makes me feel like a fraud.  Seriously.

So I decided I’m just going to come clean.  And I know I’m not alone, because I watched two Hoarders episodes, both of which “collected” massive amounts of fabric and other crafting supplies. fabricdisaster1

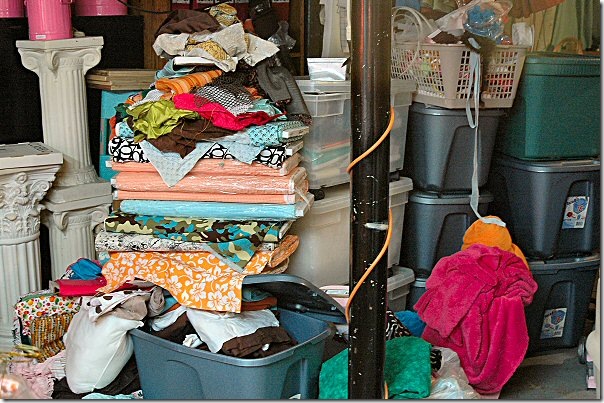
Here’s my Fabric Hall of Shame™ which includes fabric, trims and notions that have yet to be organized.  Some of them are sitting there for more than 2 years now.  And of course, there’s even more fabric in all those boxes.

Seems I make way too many purchases, stack them on the pile and leave them there for “another day.”  And when I do use fabric, I don’t refold the remaining fabric from a project.  I just throw it on the pile.  LAZY.

fabricdisaster2

Around the other side are the 16 feet of industrial cutting tables I bought more than 3 years ago—-laying unassembled up against the wall.  Next to that is the 30 yards of batting that I just had to have during one of Joann Fabric’s blowout sales 5 years ago.  Oh, did I mention, I’ve only used 2 yards of that batting since I purchased it?

fabricdisaster3

To the side of that are several mannequins (4), dress forms(5), empty storage bins (20) and shelving (10).

fabricdisaster4

And tucked in the corner are 4 industrial sewing machines which I HAVE NEVER even turned on!!!!  They’ve been sitting there for almost 4 years now.

I know I’m going to Sewing Hell™.  I know they say, “Whoever dies with the most fabric wins!”  But it’s not working for me.  I simply have more stuff than I will use in two lifetimes and I’m not using the stuff that would create my ultimate sewing room.

My entire basement dungeon is approximately 25” x 35”.  There is a small laundry area and office.  The rest is all sewing and craft stuff.  So, it’s not like I don’t have the room.  I just need to get it all organized.

I’ve spent the last two days trying to make a dent in the Fabric Hall of Shame™.  I’m making some progress and hope I don’t give up before it’s organized.  Ok…now show me yours!

lisasiggie2

Cake Push Up Pops and a Prom

CAKE PUSH UP POPS

pushuppops

Had to get together a quick dessert for the Pre-Prom party.  Quick like as in within an hour.  I had ordered some disposable plastic push-up pop containers a month ago and figured it was time to test them out.

pushpop3

Here’s a list of places to find them in larger quantities.  However, head on over to Etsy.com or Ebay.com if you just need a dozen or two.

JB Prince

Laguana Wholesale

Culinary Direct (I think they have the best prices)

Martellatousa

Cake Deco via Amazon

Push Pop Containers

Pastry Chef Central

cakepops

Now you can bake little cupcakes in mini muffin pans, but I took whatever shortcut I could.  I went into my local supermarket’s Bakery department and asked them to give me a small vanilla sheet cake without frosting.  I also picked up Jell-O Vanilla and Chocolate Pudding, some fresh Strawberries and a few cans of Whipped Cream.

Brought it all home and used my cake leveler thingy to slice the cake in half.  I then used the round part of the plunger of the push-up pop as my template to cut out small circles from the sheet cakes (got the idea from Kathy).  Worked like a charm!

I was about to put the pudding in a Ziploc bag and cut a hole at the end to fill the push-up pops.  But then I remembered I had a nifty Pampered Chef Easy Accent Decorator in my arsenal.  Yeah me!  You could also just use a disposable pastry bag.

I alternated layers of cake, pudding and strawberries.  Then I put them in the refrigerator for 20 minutes.  Right before I was walking out the door to the party, I added a little whipped cream on the top and some sprinkles.  Done!

Pushup01

Here’s some ideas for your Push-Up Pops:

Triple Rainbow Push-Up Cakes

Gourmet Mom on the Go Fireworks

Sugar Bee’s Frozen Yogurt Pops

More Gourmet Mom on the Go

Firefly Confection’s Watermelon Pops

Party Animal’s Rainbow Jello

Party Animal’s Hot Fudge Brownies

Cupcake Project Cupcakes

Cupcake Project’s Key Lime

Love From the Oven Peeps

Brandy K’s Rainbow Push Cakes

Laguna’s Recipes

holder2

Now you could buy expensive push-up pop holders like these:

JB Prince

Culinary Direct

Pastry Chef Central

But unless you are really fancy, there just no need!  You can have your handy husband drill some holes halfway into a piece of wood.  Or if you don’t have a handy husband, just get a piece of Styrofoam and poke holes in it with a screwdriver (like I did).

If you have a lot of time on your hands, you could easily cover the Styrofoam with either shredded paper grass or wrapping paper.

The cake push-up pops were a hit!  Next time I will make cute decals for them with my Silhouette Electronic Cutting Machine and even tie some pretty bows on them.

Oh and in case you didn’t know, these push up pop containers are WASHABLE and REUSABLE.  But how do you stop guests from NOT throwing them in the trash?

PROM PRINCESS

marielleprom1

Grabbed a few quick pics of Marielle leaving for her HS Prom.  The dress fit like a glove.  So glad it all went smoothly.  Between her arguing with friends and dumping her boyfriend two weeks before the prom, I didn’t think it was going to happen.  But luckily, everything worked out and she’s having a blast down the NJ Shore over the next few days.

promzilla 

Between the dress, hair, make-up application, jewelry, prom tickets, limo costs, tanning, waxing, new teeth, NYC party, NJ shore party money and eyelash extensions, it’s lucky I didn’t go broke.

When I graduated high school, it wasn’t cool to go to the Prom.  My friends and I chipped in for a keg of beer and partied down at the beach.  How times how changed!

lisasiggie

Sewing Here and Around the Web

SEW PARALYZED

Good news…darling daughter decided she didn’t need me to add a slit to her lined sequined prom gown.  Whew!  But I still had to hem it…both the lining and the dress itself.  Easy enough, I thought.  Wrong again.

Now-Panic-and-Freak-Out

See, I have a habit of “imagining” I have these advance sewing skills.  In my mind, I tell myself, “No problem.  I can easily do that.”  But then reality sets in (usually the night before a deadline) and I panic.  Often I am paralyzed with fear of screwing up.  I have thoughts of ruining the fabric with a slip of the rotary cutter, hemming something too short, or any number of things that can’t be fixed.  Truth is I’m usually winging it…trial and error (with mostly errors).  But last night, I had to suck it up and get it done.

The satin lining had a scalloped rolled hem.  I needed to take off about an inch.  Being that I’ve never perfected the rolled hem, I opted to finish the raw edge with a 4-thread overlock stitch, press up the hem and do a simple edge stitch.  It came out decent enough for a slip (no one is going to inspect it, I hope).

sequinfabricnightmare 

Next dilemma…trying to mark a cutting line on the sequin/beaded gown.  You simple cannot mark this fabric with anything…I tried chalk (which just made a mess of my cutting table) and  tape (I couldn’t curve it).  Neither solution worked.

sequin3

Then I got the bright idea to baste the cutting line on my sewing machine.  I used blue painter’s tape to mark the 4 inches distance for the basting.  Basting such thin fabric just ended up making it gather randomly.  I tried doing it on the sewing machine, but kept breaking needles (even metallic/sharp needles).  At this point, all I wanted to do was stick a needle in my eye.sequin4

I decided to just “eyeball” it.  Not perfect, but good enough.  I cut away all the sequins and beads in the path of the needle and did a 3-thread rolled hem on the serger. Worked pretty good.  And she’ll only be wearing the dress for 3 or 4 hours.  Then the gown will be thrown in the bottom of her suitcase never to be worn again.sequin5

I have to spend today cleaning up the mess the darn sequins and beads made.  They are everywhere!  Never again will I sew with this type of fabric.  I detest it.

promdress2011 

But really…it could have been so much worse.  Originally, she wanted me to alter this teal sequin gown (pictured above) from my wedding (20 years ago!!!).  It’s fully sequined, lined and has boning.  Thankfully, she picked out the brown sequin gown and it’s done!  I’ll post pictures of her in the brown gown tomorrow after prom.

SEWING AROUND THE WEB

giant scissors baileys home and garden dot com

Here’s an easier way to sew an elastic casing:  Elastic Casing

Luvininthemommyhood posted about How the Heck to Buy and Choose a Sewing Machine

Wildflowers and Whimsy has a great Bustle Back Dress Tutorial posted.

Pam Enry (one of the most talented shirt makers around) shows us how to sew a designer elasticated casing.

Laurie Anderson shares a great Lace Insertion Tutorial.

Check out Dawn’s (Olabelhe) new sewing room!!!  WOW!

Happy Sewing!

With friendship,

Lisa

inchetap